Delicious Snow Ice Cream Recipe: Easy & Homemade
Waking up to a snowy morning is magical. As a kid, I loved the chance of a snow day. Making snow ice cream was a fun winter tradition.
When life gives you snow, make homemade snow ice cream! It’s a simple treat that takes just 5 minutes. I still love making it with my family. Now, I’m excited to share this easy snow ice cream recipe with you.
In this article, you’ll learn how easy it is to make this dessert at home. Get ready for a sweet and creamy treat perfect for the whole family.
Table of Contents
The Magic of Winter Treats
Winter is a great time to make delicious snow ice cream. It’s a fun activity that makes the season even better.
Thinking about snow ice cream, I see it’s simple yet joyful. Easy snow ice cream is more than a dessert. It’s a way to relive childhood winters.
What Makes Snow Ice Cream Special
Snow ice cream is special because it’s easy to make. You just need a few ingredients and a few minutes. It’s a fun activity for the whole family.
It’s also a great way to enjoy winter. You get to use the snow around you. Its simplicity makes it fun for everyone.
| Aspect | Description |
|---|---|
| Simplicity | Requires just a few ingredients |
| Fun Activity | Engaging for the whole family |
| Seasonal Enjoyment | Makes the most of winter snow |
My Childhood Memories of Snow Desserts
As a kid, snow days were the best. Making snow ice cream was always a highlight. I loved running outside to get snow and mix it with milk and sugar.
“The best snow ice cream is made with love and a dash of winter magic.”
Those memories still bring me joy. Now, I make snow ice cream with my family. We create new memories and keep a tradition alive.

Safety First: Collecting Clean Snow
Before you start making your best snow ice cream, it’s crucial to understand the importance of collecting clean snow. The quality of the snow directly impacts the safety and taste of your final product.

When and Where to Collect Snow
The timing and location of snow collection are critical. Collect snow immediately after it falls to minimize the chance of contamination. Look for snow that has fallen in areas away from roads and urban pollution. Open fields or backyards can be ideal locations if they’re not near any potential sources of contamination.
- Avoid collecting snow near busy roads or areas with heavy foot traffic.
- Opt for freshly fallen snow, as it’s likely to be cleaner.
- Be mindful of any local environmental advisories that might affect snow quality.
How to Tell If Snow Is Safe to Eat
Not all snow is created equal when it comes to making safe snow ice cream. You need to assess the snow’s quality before using it.
Signs of Clean Snow
Clean snow should be white and free of visible debris. If the snow looks gray, yellow, or has any unusual odor, it’s best to avoid it.
Snow to Avoid
Avoid snow that’s been contaminated with dirt, leaves, or other foreign materials. Also, be cautious of snow that’s been treated with chemicals or is near areas where chemicals might have been used.
By being selective about the snow you collect, you can ensure that your traditional snow ice cream recipe turns out not only delicious but also safe to enjoy.
Essential Ingredients for Snow Ice Cream
To make this winter treat, you’ll need a few key ingredients. Snow ice cream is easy to make. It’s a simple dessert that’s fun to make and delicious to eat.
Basic Ingredients You’ll Need
The main ingredients for snow ice cream are milk, sugar, vanilla, sea salt, and fresh snow. Each ingredient is important for a tasty and creamy dessert.
Milk Options
There are many milk choices for snow ice cream. You can use whole milk for a richer taste or 2% or skim milk for a lighter version. Some people add condensed milk for extra creaminess. The type of milk you choose can change the flavor and texture of your ice cream.

You’ll also need a sweetener and flavorings. Granulated sugar is common, but you can try honey or maple syrup too. Vanilla extract is a classic choice that goes well with the ice cream’s cold, creamy texture. A little fine sea salt can also make the flavors better and balance the sweetness.
Optional Add-ins for Extra Flavor
Adding optional ingredients can make your snow ice cream even better. Try cocoa powder or melted chocolate for a chocolatey flavor. Or mix in fruit purees for a fruity twist. You can also use different extracts, like almond or peppermint, for unique tastes. The options are endless, so you can make your ice cream just the way you like it.
Tools and Equipment for Success
Having the right tools is key for a quick snow ice cream recipe. You’ll need basic kitchen tools and containers for snow. This will help you make a delicious winter treat.
Kitchen Tools You’ll Need
You’ll need a large mixing bowl, a spoon or whisk, and a measuring cup. I used a huge salad bowl for mixing, needing about 10-12 cups of snow. A sturdy spoon or whisk is crucial for mixing well.
- Large mixing bowl
- Spoon or whisk
- Measuring cups
Snow Collection Containers
You’ll need clean containers to collect snow. They should be big enough to hold a lot of snow. I used a huge salad bowl, which held about 10-12 cups of snow. You can use:
- Large salad bowls
- Plastic containers
- Buckets

My Favorite Snow Ice Cream Recipe: Step-by-Step
Snow ice cream is a classic winter treat that’s easy to make at home. You just need a few ingredients and some fresh snow. It’s perfect for a cold winter’s day.
Preparing Your Base Mixture
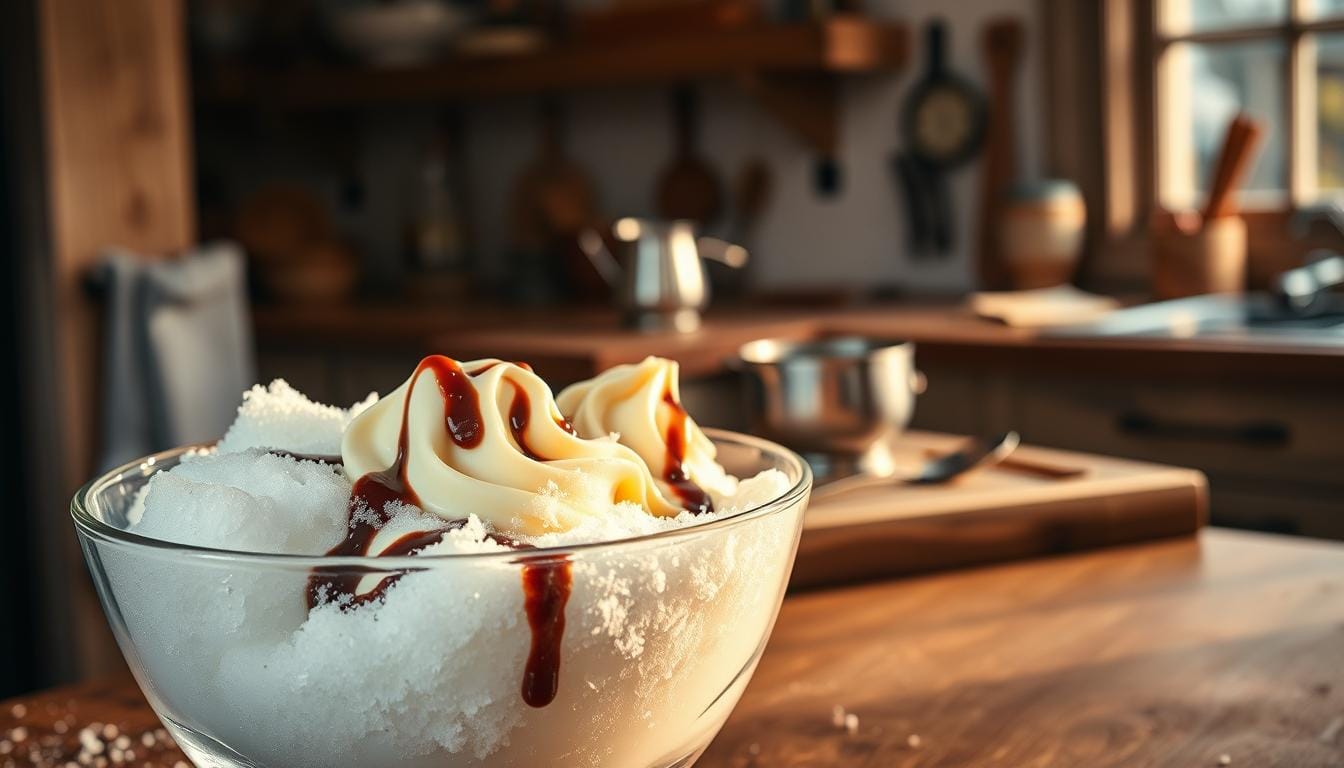
To start, mix the base for your snow ice cream. In a large bowl, whisk together 1 cup of milk, 1/2 cup of sugar, 1 teaspoon of vanilla extract, and a pinch of salt. This mixture is the base, adding sweetness and creaminess.
While whisking, scrape down the bowl sides. This ensures all ingredients mix well. Your mixture should be smooth and lump-free for a consistent texture.
Adding and Mixing the Snow
Now, add the snow to your base mixture. Go outside and collect some fresh, clean snow in a separate container. Make sure the snow is clean and free from dirt or leaves.
Stir the snow into the base mixture until it reaches your desired consistency. Start with a small amount of snow and add more until it’s just right. You can make it creamy or icy, depending on your preference.

Achieving the Perfect Consistency
Getting the right consistency is key. If it’s too icy, add a bit more milk. If it’s too runny, add more snow. Aim for a creamy texture that still feels a bit icy.
Texture Tips
To achieve the perfect texture, add snow gradually and mix well after each addition. Experiment with different snow to base ratios to find your favorite.
- Add snow gradually to avoid making the mixture too icy.
- Mix well after each addition to ensure an even texture.
- Adjust the ratio of snow to base mixture to suit your taste.
Troubleshooting
If your snow ice cream is too icy or too runny, don’t worry. Here are some tips:
| Issue | Solution |
|---|---|
| Too Icy | Add a bit more milk to thin out the mixture. |
| Too Runny | Add more snow to thicken the mixture. |
| Not Sweet Enough | Add a bit more sugar to taste. |
By following these steps and tips, you can make delicious snow ice cream. It’s sure to become a family favorite. Enjoy your homemade snow ice cream!
Delicious Variations of Snow Ice Cream
With just a few ingredients, you can make many tasty snow ice cream flavors. Snow ice cream is great because you can try different mix-ins and toppings. This lets you create unique flavors.
Chocolate Snow Ice Cream
Chocolate fans will love adding cocoa powder or melted chocolate to their snow ice cream. You can also add chocolate chips or shavings for more chocolate taste. This flavor is perfect for those who love deep, chocolatey desserts.
To make chocolate snow ice cream, add 1-2 tablespoons of cocoa powder to your base mixture. Adjust the cocoa powder to your liking for the chocolate flavor you prefer.
Vanilla Bean Snow Ice Cream
Vanilla bean snow ice cream is a classic and elegant choice. Adding vanilla extract or vanilla bean paste makes it creamy and smooth. The sweetness of vanilla goes well with the snow’s freshness.
To make vanilla bean snow ice cream, add 1/2 teaspoon of vanilla extract or 1/4 teaspoon of vanilla bean paste. You can also add vanilla bean seeds for extra texture and look.
Fruit-Flavored Snow Ice Cream
Fruit-flavored snow ice cream is a refreshing twist. Using fruit purees like raspberry or strawberry adds flavor. This option is great for a lighter dessert.
To make fruit-flavored snow ice cream, mix 1-2 tablespoons of your favorite fruit puree into the base mixture. Adding fresh fruit pieces or fruit sauce on top adds more flavor and texture.
Adult Snow Ice Cream Variations
Adults can enjoy more sophisticated flavors by adding liqueur or other ingredients. For example, adding bourbon or rum gives a grown-up twist.
Other adult variations include adding coffee or espresso for a mocha flavor. You can also mix in crushed cookies or candy for texture and flavor.
Here’s a summary of the different snow ice cream variations you can try:
| Flavor | Main Ingredient | Description |
|---|---|---|
| Chocolate | Cocoa powder or melted chocolate | Rich, chocolatey treat |
| Vanilla Bean | Vanilla extract or vanilla bean paste | Creamy and smooth |
| Fruit-Flavored | Fruit purees | Refreshing and fruity |
| Adult Variations | Liqueurs or adult-oriented ingredients | Sophisticated and unique flavors |

Snow Ice Cream with Condensed Milk
Adding condensed milk to snow ice cream makes it richer. I tried it and noticed a big difference in taste and texture.

Condensed milk makes snow ice cream taste better and feel creamier. It has more fat than regular milk, making it smoother.
Why Condensed Milk Creates Creamier Results
Condensed milk is made by removing most of the water from milk. This leaves a creamy liquid. When you use it in snow ice cream, it adds a luxurious texture that’s hard to get with regular milk or cream.
The sugar in condensed milk also balances the flavor of the snow ice cream. It makes it sweeter and more enjoyable, even with less clean snow.
| Benefits | Description |
|---|---|
| Creamier Texture | Condensed milk adds a rich, smooth texture to snow ice cream. |
| Balanced Flavor | The sweetness of condensed milk balances out the flavor. |
| Easy to Make | Using condensed milk is a straightforward way to enhance snow ice cream. |
Step-by-Step Condensed Milk Recipe
Ingredients List
To make snow ice cream with condensed milk, you’ll need:
- 1 can of condensed milk
- A bowl of freshly fallen, clean snow
- Optional: flavorings like vanilla or cocoa powder
Mixing Instructions
Pour the condensed milk into a large bowl. Add the clean snow slowly, stirring until it’s smooth. If you’re using flavorings, mix them in well.
Keep stirring until the ice cream is smooth and creamy. You can adjust the snow to get the texture you like, from soft to icy.
Dairy-Free and Vegan Snow Ice Cream Options
Making snow ice cream without dairy is easy with plant-based milks and sweeteners. This makes it fun for everyone, no matter their diet. You can pick any milk you like, from dairy to plant-based, and even add flavorings.
Plant-Based Milk Alternatives
The milk you choose can change the taste and feel of vegan snow ice cream. Almond milk, coconut milk, and cashew milk are favorites. Coconut milk, with its high fat, makes it extra creamy.
| Milk Type | Taste | Texture |
|---|---|---|
| Almond Milk | Light, slightly nutty | Watery |
| Coconut Milk | Coconut flavor | Creamy |
| Cashew Milk | Creamy, slightly sweet | Creamy |
Sweetener Options for Vegan Snow Ice Cream
Looking to avoid refined sugars or follow a vegan diet? There are many sweetener options. Maple syrup and agave nectar are favorites for their plant-based goodness and unique tastes. Here’s a quick look at some sweeteners:
- Maple syrup: Rich, distinct flavor
- Agave nectar: Mild, slightly sweet
- Coconut sugar: Less refined, caramel-like flavor
Try different sweeteners to find the perfect taste for your snow ice cream.
Fun Toppings and Mix-ins
Customizing snow ice cream with your favorite toppings is the best part. Whether you prefer classic combos or new flavors, the right toppings make a big difference. They can take your snow ice cream to the next level.
Classic Ice Cream Toppings
Classic toppings are always a hit with snow ice cream. Sprinkles, chocolate chips, whipped cream, and nuts are favorites. Sprinkles might bleed color, but they still taste amazing. Fresh or dried fruits like strawberries and blueberries add natural sweetness.
Unique Topping Ideas to Try
Want to get creative with your snow ice cream? Try unique toppings. You can make your own homemade sauce options like caramel, hot fudge, or fruit coulis. These add a rich, velvety texture.
Homemade Sauce Options
- Caramel sauce made with heavy cream and butter
- Hot fudge sauce for chocolate lovers
- Fruit coulis like raspberry or strawberry for a sweet and tangy taste
Crunchy Add-ins
For extra texture, add crunchy add-ins like crushed cookies, candy pieces, or cereal. Here are some fun options:
| Topping | Description |
|---|---|
| Crushed Oreos | Adds a cookies-and-cream flavor |
| M&M’s | Provides a colorful and chocolatey mix-in |
| Cereal | Like Froot Loops or Cocoa Puffs for a fun surprise |
As you try different toppings and mix-ins, you’ll find your favorite combination. Enjoy making your quick snow ice cream recipe even more special with these creative ideas!
Troubleshooting Common Snow Ice Cream Problems
Making snow ice cream is simple, but issues can pop up. Getting the right texture and storing leftovers are common problems. We’ll look at ways to solve these issues.
Too Runny? Here’s How to Fix It
If your snow ice cream is too runny, it might be because the snow was too wet. Or you didn’t add enough thickening ingredients. To fix it, add more snow slowly until it’s right. Or, refrigerate it for 10-15 minutes to firm it up before serving. Don’t add too much snow, as it can make it too icy.
Too Icy? Try These Solutions
If it’s too icy, it could be because the snow was too cold. Or you didn’t mix the ingredients well. Mix your base thoroughly before adding snow. Adding a bit more milk or cream can also help. Try different snow to milk ratios to see what works best.
Storing Leftover Snow Ice Cream
Fresh snow ice cream doesn’t freeze well. So, it’s best to eat it right away. If you must store leftovers, put them in an airtight container in the freezer. Press plastic wrap on the surface before sealing to prevent ice crystals. Let it soften at room temperature for a few minutes before serving.
Making Snow Ice Cream with Kids
I love making simple snow ice cream with my kids. It’s a fun activity for everyone. It’s great for kids of all ages, or anyone who loves being a kid again.
Making snow ice cream is a fun and learning experience. You can give each child a task based on their age. This way, everyone gets to help and have fun.
| Age Group | Tasks |
|---|---|
| 3-5 years | Helping to mix the ingredients, sprinkling toppings |
| 6-8 years | Measuring ingredients, stirring the mixture |
| 9+ years | Collecting snow, helping with more complex mixing tasks |
Age-Appropriate Tasks for Children
Getting kids involved makes it more fun and teaches them new things. Young kids (3-5 years) can sprinkle toppings or mix. Older kids (6-8 years) can measure and stir. Teenagers can collect snow and do harder tasks.
Making It Educational and Fun
Making snow ice cream is both fun and educational. You can teach kids about measurements and fractions. It’s also a chance to talk about cleanliness and safety when collecting snow.
Make it more fun by trying different flavors and toppings. Let the kids be creative with their easy snow ice cream or simple snow ice cream.
No Snow? Alternative “Snow” Ice Cream Recipes
If you’re craving snow ice cream but can’t find any snow, don’t worry, I’ve got you covered. You can still enjoy this delightful treat using alternative ingredients.
One of the best substitutes for snow is shaved ice. It’s easily available at most ice cream shops or can be made at home using a blender or ice shaver.
Using Shaved Ice Instead
Using shaved ice is a great way to make snow ice cream. Simply mix it with your favorite ingredients, such as condensed milk and vanilla extract, to create a delicious and creamy dessert. The texture might be slightly different, but it’s just as enjoyable.
Creating a Similar Experience Year-Round
With shaved ice or even crushed ice, you can enjoy a snow-like ice cream experience any time of the year. Experiment with different flavors and toppings to keep things interesting. You can also use this method to make snow ice cream with condensed milk, a creamier version that’s sure to please.
By getting creative with your ingredients, you can have your favorite snow ice cream all year round, regardless of the weather outside.
Conclusion: Enjoy Your Homemade Snow Ice Cream
Now you know how to make traditional snow ice cream. It’s time to enjoy what you’ve made. Scooping up fresh snow and turning it into dessert is magical.
Get creative with your snow ice cream. Try different flavors and toppings to make it your own. This way, you can enjoy a tasty treat that’s uniquely yours.
Next time you wake up to a winter wonderland, make snow ice cream. This simple recipe lets you create a delicious treat. Homemade snow ice cream is a great way to enjoy the season, whether with kids or alone.
FAQ
What is snow ice cream?
Is it safe to eat snow ice cream?
What kind of snow is best for making snow ice cream?
Can I use any type of milk for snow ice cream?
How do I achieve the right consistency for my snow ice cream?
Can I make snow ice cream with condensed milk?
Are there any dairy-free or vegan options for snow ice cream?
How can I store leftover snow ice cream?
Can I make snow ice cream without actual snow?
Is making snow ice cream a fun activity for kids?
What are some unique topping ideas for snow ice cream?
How can I make a simple snow ice cream recipe?
Can I make classic snow ice cream?
What is a quick snow ice cream recipe?
How do I make the best snow ice cream?
Is homemade snow ice cream easy to make?
Have You Tried Our Recipe Yet?
i tried this recipe and i like it
Absolutely delicious! 🍽️🔥 I tried your recipe, and it turned out amazing! The instructions were clear, and the flavors were perfectly balanced. Thank you for sharing such a fantastic dish—definitely adding this to my favorites! Can’t wait to see more recipes from you! 👏😍