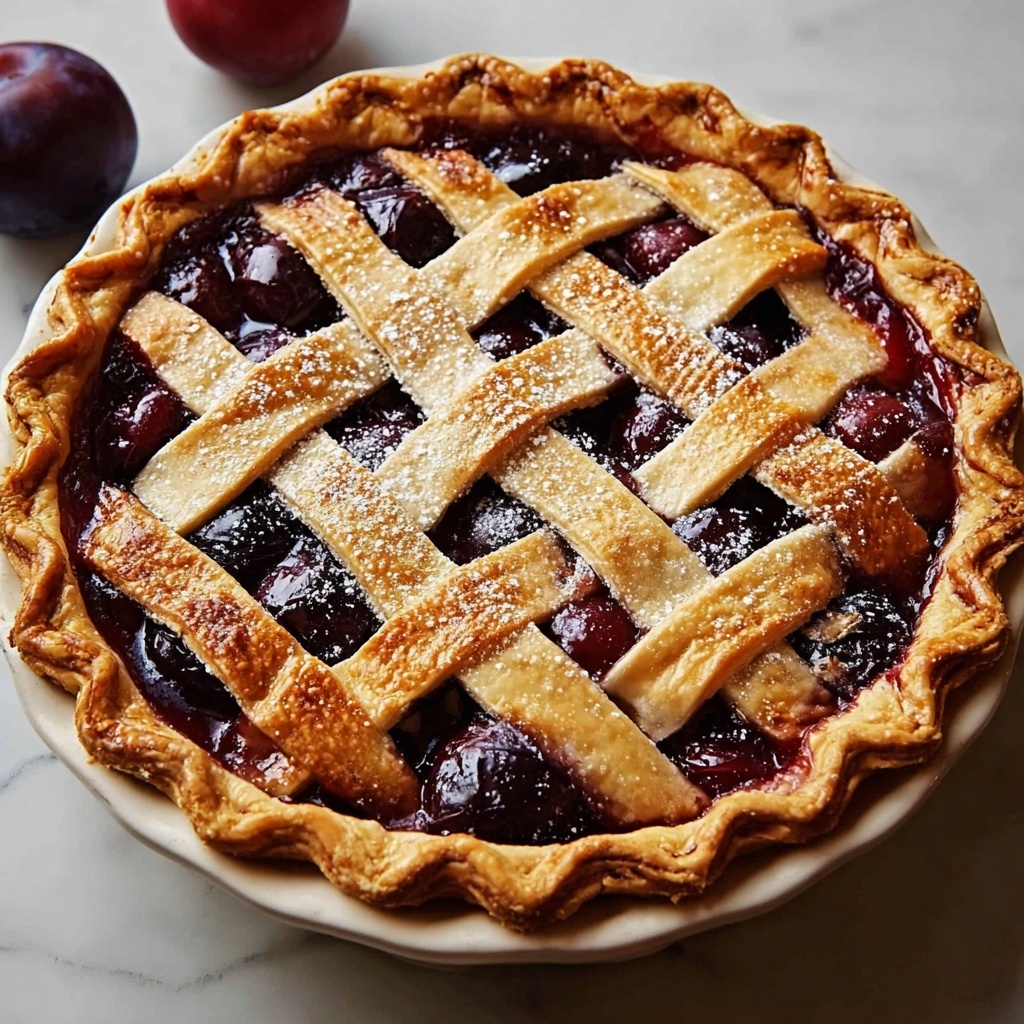
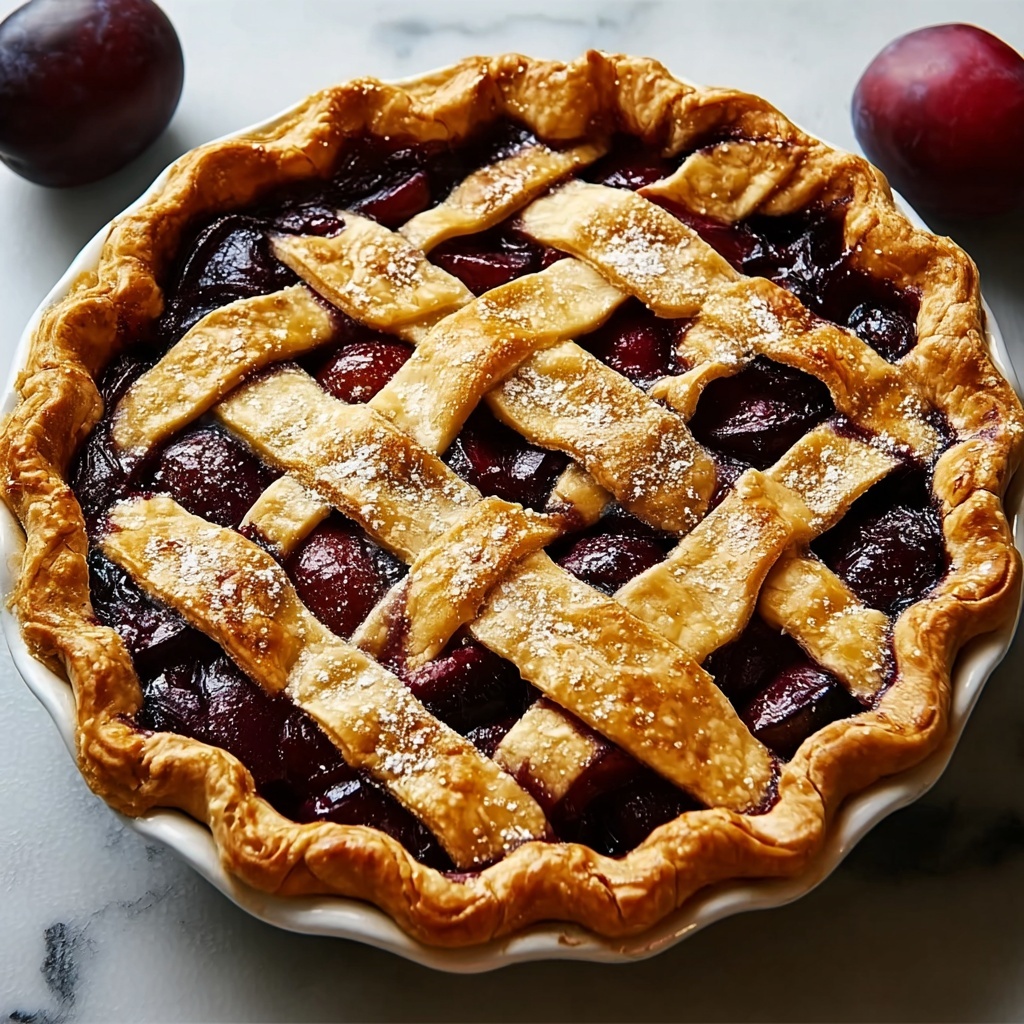
If you’re craving a dessert that beautifully combines the rustic charm of homemade pastry with the vibrant sweetness of fresh fruit, this Plum Lattice Pie Recipe is an absolute must-try. It’s a stunning centerpiece that brings together tart, juicy plums nestled beneath a golden, buttery lattice crust, while the warm spices gently tickle your taste buds. The gentle crunch from toasted almonds adds a delightful texture, making every bite a celebration of flavors and colors that will have your friends and family asking for seconds. Trust me, this pie isn’t just a treat—it’s a delicious experience worth sharing.

Ingredients You’ll Need
Gathering simple, quality ingredients is the secret to baking a show-stopping pie. Each item contributes to the tender crust, luscious filling, or the perfect sprinkle of crunchy texture on top.
- 275g plain flour: The foundation of your tender, flaky pastry—plus a little extra for dusting as you roll it out.
- 2 tablespoons icing sugar: Adds a subtle sweetness to the pastry without overpowering it.
- 130g unsalted butter, cold and cubed: Essential for a rich, flaky crust that melts in your mouth.
- 3 medium free-range egg yolks: Used to bind the dough and make the pastry golden and glossy when brushed on top.
- Milk: For brushing over the lattice to achieve a beautiful, shiny finish.
- Caster sugar: Sprinkled on top, it caramelizes while baking to create an irresistible crunch.
- 50g flaked almonds: Toasted for an irresistible nutty crunch that pairs perfectly with the sweet plums.
- 10 plums (about 1.3kg): The star of the show—ripe, juicy, and bursting with vibrant color and flavor.
- 50g unsalted butter: Cubed and mixed with the plums to enrich the filling.
- 100g caster sugar: Sweetens the filling while balancing the tartness of the plums.
- 1 teaspoon ground cinnamon: Adds warming spice and depth that complements the fruit.
- ½ teaspoon ground ginger: Brings a subtle kick and aromatic warmth.
- 3 tablespoons cornflour: Helps thicken the filling so it sets beautifully without being runny.
How to Make Plum Lattice Pie Recipe
Step 1: Prepare the Pastry
Begin by sifting the plain flour, icing sugar, and a pinch of salt into your food processor bowl. Add the cold, cubed butter and pulse until you get a fine breadcrumb texture. This step is crucial for creating those flaky layers we all love in pie crust. Then, add 2 of the egg yolks and about 60ml of ice-cold water gradually, pulsing carefully until the dough just comes together. Turn it out onto your work surface and gently knead for around 30 seconds—don’t overwork it! Divide the dough into two discs, wrap in clingfilm, and pop them in the fridge to chill for 30 minutes.
Step 2: Make the Filling
While the pastry chills, toast the flaked almonds in a dry pan till golden to enhance their nutty aroma. Next, halve and stone your plums, quartering any especially large ones so all pieces are roughly the same size. Toss the plums with the cubed butter, caster sugar, cinnamon, ground ginger, and cornflour until everything is well coated. The cornflour is the magic ingredient here—it thickens the juices released during baking without compromising the fruit’s juiciness.
Step 3: Assemble the Pie Base
Preheat your oven to 200ºC (400ºF/gas 6) and place a baking tray inside—it will help bake the pie bottom evenly. Roll out the larger pastry disc on a floured surface into a circle slightly bigger than your 23cm pie tin. Gently press the pastry into the tin and trim to leave a 2.5cm overhang. Chill the base in the fridge to keep the butter firm before adding the filling.
Step 4: Create the Lattice Top
Roll out the smaller pastry disc and cut it into eight long strips about 2.5cm wide. When ready to assemble, pile the luscious plum mixture into the chilled pie base. With a brush, lightly paint the edges of the pastry with a combination of beaten egg yolk and milk to help the lattice strips stick. Then, weave the strips over the filling to form a classic lattice pattern. Trim any excess pastry, press edges to seal neatly, and crimp with your fingers for charm. Brush the lattice generously with the egg wash and sprinkle caster sugar on top for a sparkling finish. Pop the whole pie back in the fridge for 30 minutes to firm up before baking.
Step 5: Bake to Perfection
Place the pie on the preheated baking tray and bake at 200ºC for 20 minutes, turning occasionally to brown evenly. Then reduce the oven temperature to 180ºC (350ºF/gas 4) and bake for another 20 to 30 minutes. Keep an eye on the crust—if it starts to brown too quickly, tent the pie with foil. Once baked, remove from the oven and let cool for at least 3 hours to allow the filling to set perfectly.
How to Serve Plum Lattice Pie Recipe
Garnishes
Adding a dollop of freshly whipped cream or a scoop of vanilla ice cream is pure bliss alongside this pie. A sprinkle of toasted almonds on top just before serving can boost the nutty flavor and add an elegant crunch. For a fresh contrast, a few sprigs of mint also bring a lovely color pop and refreshing lift to each bite.
Side Dishes
This pie is a dessert star all on its own but pairs wonderfully with a light salad of mixed greens if you’re serving it after a rich meal. For a cozy afternoon tea, some warm custard or a pot of spiced chai complements the warm spices in the filling beautifully. These sides balance sweetness and spice, making your meal complete and unforgettable.
Creative Ways to Present
If you want to impress guests visually, serve slices of the plum lattice pie on rustic wooden boards with a dusting of icing sugar or cinnamon. You could also plate slices alongside a quenelle of crème fraîche and scatter edible flowers or fresh plum slices to elevate the presentation. Little touches like these transform an everyday dessert into something truly special.
Make Ahead and Storage
Storing Leftovers
Leftover pie keeps beautifully in an airtight container in the fridge for up to three days. The crust may soften slightly, but the flavor will deepen, making for an equally delicious second serving. Just be sure to cover it well to retain moisture and avoid absorbing other fridge odors.
Freezing
This Plum Lattice Pie Recipe also freezes exceptionally well. Wrap the cooled pie tightly in plastic wrap and then aluminum foil before placing it in the freezer. It can be frozen for up to two months. When you’re ready to enjoy it, thaw the pie overnight in the fridge.
Reheating
To bring back that fresh-baked warmth, reheat slices in a preheated oven at 160ºC (320ºF) for about 10-15 minutes. This will restore the crispness of the lattice crust and warm the spiced plum filling just right. Avoid microwaving if you want to keep the pastry flaky.
FAQs
Can I use frozen plums for this pie?
While fresh plums yield the best texture and flavor, you can use frozen plums if fresh ones aren’t available. Just be sure to thaw and drain them well before using to avoid an overly soggy filling.
What’s the purpose of the lattice crust?
The lattice crust not only looks stunning but also allows steam to escape while baking, preventing a soggy filling and helping the plums cook evenly.
Can I make the pastry by hand instead of using a food processor?
Absolutely! Just rub the cold butter into the flour and icing sugar with your fingertips until the mixture resembles breadcrumbs, then proceed with the recipe as directed.
How important is chilling the pastry?
Chilling the pastry helps relax the gluten and keeps the butter cold, which results in a flakier and more tender crust. It’s a step definitely worth the wait!
Can this pie be made gluten-free?
Yes, by substituting the plain flour for a gluten-free baking blend suitable for pastries. You may need to adjust hydration slightly, so add water carefully when bringing the dough together.
Final Thoughts
I can’t recommend this Plum Lattice Pie Recipe enough if you want to wow your loved ones with a dessert that feels both homemade and a little special. The combination of juicy plums, warm spices, buttery crust, and crunchy almonds is a match made in heaven. Once you try it, this pie will quickly become your go-to for gatherings or cozy evenings—guaranteed to fill your kitchen with comforting aromas and your heart with joy.
Print
Plum Lattice Pie Recipe
- Prep Time: 40 minutes
- Cook Time: 50 minutes
- Total Time: 1 hour 30 minutes
- Yield: 8 servings
- Category: Dessert
- Method: Baking
- Cuisine: British
Description
This Plum Lattice Pie features a buttery, flaky pastry filled with a spiced plum mixture, topped with a beautiful lattice crust and toasted flaked almonds. Perfectly balanced with cinnamon and ginger, this classic dessert is baked to golden perfection and cooled to set, making it an ideal treat for gatherings or cozy afternoons.
Ingredients
Pastry
- 275g plain flour, plus extra for dusting
- 2 tablespoons icing sugar
- 130g unsalted butter, cold and cubed
- 3 medium free-range egg yolks
- Milk (for brushing)
- Caster sugar (for sprinkling)
Filling
- 10 plums (about 1.3kg), halved, stoned, and quartered if large
- 50g unsalted butter, cubed
- 100g caster sugar
- 1 teaspoon ground cinnamon
- ½ teaspoon ground ginger
- 3 tablespoons cornflour
Topping
- 50g flaked almonds, toasted
Instructions
- Prepare the Pastry: Sift the flour, icing sugar, and a pinch of sea salt into the bowl of a food processor. Add the cold butter and blitz until the mixture resembles fine breadcrumbs.
- Add Wet Ingredients: Add 2 egg yolks and 60ml of ice-cold water gradually pulsing until the mixture forms a rough dough.
- Knead Dough: Turn out the dough onto a clean surface and gently knead for about 30 seconds until smooth, adding extra flour if necessary.
- Chill Dough: Divide the dough into two pieces, one larger than the other. Roll into discs, wrap in clingfilm, and chill in the fridge for 30 minutes.
- Toast Almonds: Toast the flaked almonds in a dry frying pan until golden and set aside.
- Prepare Filling: Halve and stone plums, quarter larger ones, then combine them in a large bowl with cubed butter, caster sugar, cinnamon, ginger, and cornflour. Stir well and set aside.
- Preheat Oven: Heat the oven to 200ºC/400ºF/gas 6 and place a baking tray inside to warm.
- Roll Out Base: Roll out the larger pastry disc and press it into a 23cm pie tin, trimming to leave a 2.5cm overhang. Chill the base in the fridge.
- Cut Lattice Strips: Roll out the smaller disc and cut into eight strips about 2.5cm wide.
- Fill Pie: Pile the plum mixture into the chilled base. Brush the edges of the pastry with beaten egg yolk mixed with a splash of milk.
- Create Lattice Top: Weave the pastry strips over the filling to make a lattice pattern, trim excess pastry, press to seal, and crimp edges with fingers.
- Egg Wash & Chill: Brush the lattice top with egg wash, sprinkle caster sugar, and chill for 30 minutes in the fridge.
- Bake Pie First Stage: Transfer the pie to the hot baking tray and bake at 200ºC/400ºF/gas 6 for 20 minutes, rotating occasionally.
- Bake Pie Second Stage: Reduce oven to 180ºC/350ºF/gas 4 and continue baking for 20 to 30 minutes more, covering with foil if browning too quickly.
- Cool Pie: Remove from oven, sprinkle extra sugar, and let the pie set for at least 3 hours before serving.
- Serve: Cut into slices and serve with ice cream or crème fraîche, if desired.
Notes
- Ensure the butter is cold for a flaky pastry texture.
- Chilling the dough twice helps maintain the pastry’s flakiness and prevents shrinking.
- Using a hot baking tray ensures a crisp bottom crust.
- The lattice top can be varied in width or pattern for visual interest.
- Letting the pie set fully before slicing ensures cleaner slices and better filling consistency.
- Optional: Serve warm or chilled depending on preference.


