
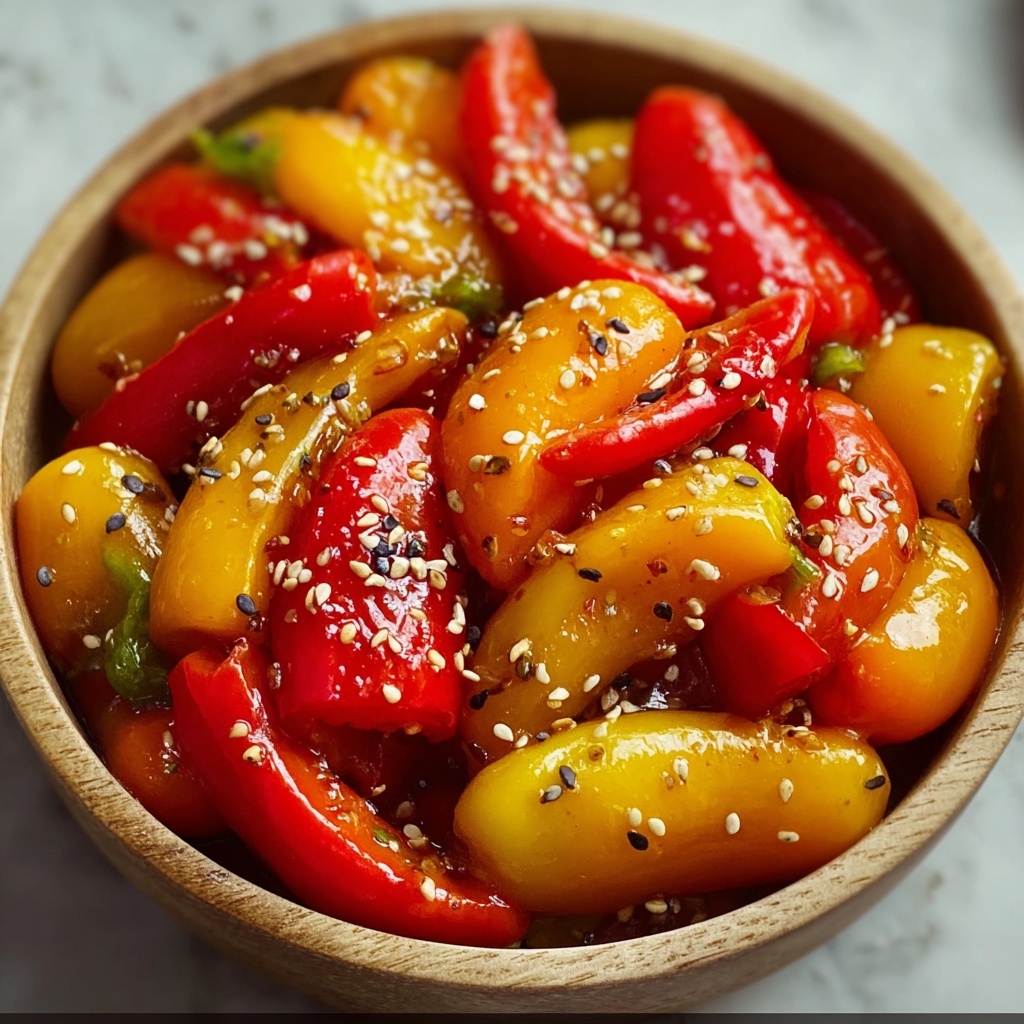
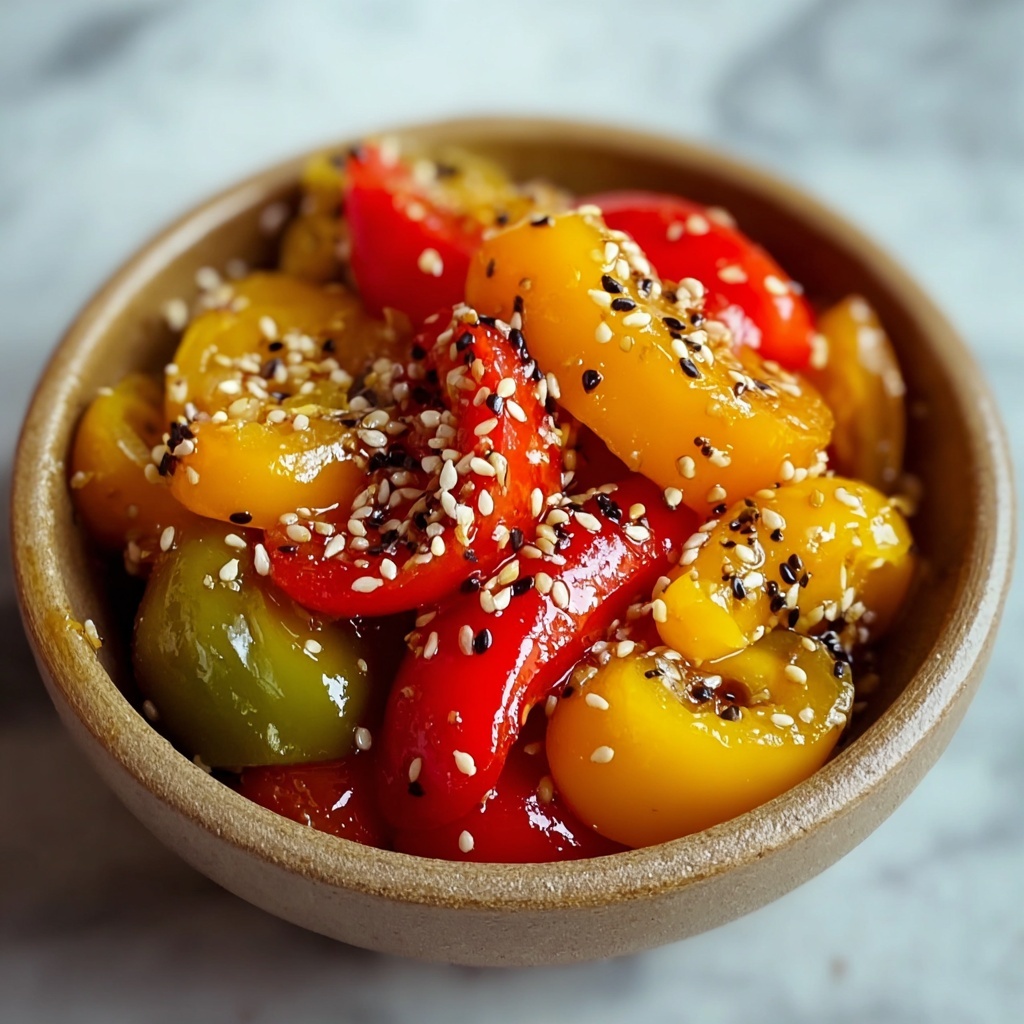
If you love a little tangy crunch to spice up your meals, then this Pickled Peppers Recipe is about to become your new favorite! It’s a bright, vibrant way to preserve fresh peppers that balances heat, sweetness, and zest in every bite. Whether you’re adding a spicy kick to sandwiches or jazzing up salads, these pickled peppers bring that perfect pop of flavor and a delightful texture that is irresistible. Plus, they’re super simple to make and utterly versatile, making them a must-try for anyone who enjoys bold, homemade condiments.
Ingredients You’ll Need
The magic behind this Pickled Peppers Recipe lies in its simple yet essential ingredients. Each component plays a starring role, from the fresh, crisp peppers to the tangy punch of vinegar and the subtle hints of aromatic spices that infuse every jar with unforgettable flavor and color.
- Fresh peppers (1 lb): A mix of jalapeños, banana, and bell peppers offers a variety of heat levels and vibrant colors.
- White vinegar (1 cup): Provides the essential acidity that gives pickles their signature tang.
- Water (1/2 cup): Balances the sharpness of the vinegar for a mellow brine.
- Sugar (1 tbsp): Adds just the right touch of sweetness to offset the acidity and heat.
- Salt (1 tbsp): Enhances all the flavors and helps preserve the peppers.
- Garlic cloves (2, smashed): Infuses the brine with a punch of savory aroma.
- Black peppercorns (1 tsp): Adds a gentle background spice that warms the palate.
- Mustard seeds (1/2 tsp, optional): Brings a slight nutty, spicy note that deepens complexity.
- Coriander seeds (1/2 tsp, optional): Offers a citrusy, floral hint for extra brightness.
- Bay leaf (1, optional): Gives a subtle earthiness to round out the flavors.
- Small onion, thinly sliced (optional): Adds crunch and sweetness paired perfectly with the peppers.
How to Make Pickled Peppers Recipe
Step 1: Prepare the Peppers
First things first, grab your peppers and give them a good wash to remove any dirt or impurities. You can slice the peppers into lovely rings for quick pickling or keep them whole if you prefer a chunkier texture. If you go whole, a few tiny pricks with a fork will help the brine seep right inside, ensuring every bite is bursting with flavor.
Step 2: Prepare the Pickling Brine
In a medium saucepan, combine your vinegar, water, sugar, salt, smashed garlic, black peppercorns, mustard and coriander seeds, along with the bay leaf if you’re using it. Bring this mix to a gentle simmer over medium heat, stirring here and there until all the sugar and salt dissolve completely. Then take it off the heat and let it cool just a bit—this warm but not hot brine will soak into your peppers beautifully.
Step 3: Pack the Jars
Next, start packing those prepared peppers into sterilized glass jars. If you decided to include the thinly sliced onions, layer those in now. Whether it’s one big jar or a few smaller ones, make sure you keep the peppers snug but not squished, allowing room for the brine to work its magic.
Step 4: Pour the Brine
Pour the hot pickling brine over the peppers, fully covering them to ensure every piece is salted and spiced. Use a spoon to gently push the peppers down if needed so they stay submerged. Leaving about half an inch of headspace at the top helps the jars seal properly.
Step 5: Seal and Cool
Seal your jars with airtight lids and set them aside to cool to room temperature. This cooling step is key before refrigerating. Once cool, pop the jars into the fridge for at least 24 hours—the flavors will blossom and meld during this time, giving you that perfect tangy crunch you’re aiming for.
Step 6: Serve and Enjoy
After a day in the fridge, your pickled peppers are ready to star in your meals. Tangy, crisp, and full of vibrant flavor, they are perfect for spicing up everything from sandwiches, tacos, or even simple cheese platters. Enjoy the burst of flavor and the satisfaction of homemade goodness!
How to Serve Pickled Peppers Recipe
Garnishes
Pickled peppers make an outstanding garnish thanks to their bright, colorful appearance and zesty bite. Scatter a few rings over tacos, grilled meats, or salads for a burst of flavor and a beautiful pop of color that instantly elevates your dish.
Side Dishes
These pickled delights pair wonderfully with creamy dishes or rich proteins. Think alongside roasted chicken, grilled steak, or a simple cheese and charcuterie board where their acidity perfectly cuts through heavier flavors.
Creative Ways to Present
Mix things up by incorporating these pickled peppers into sauces, dips, or even blended into salad dressings. You can also chop them finely and sprinkle over avocado toast or use them as a topping for homemade pizzas. Their versatility means there’s no shortage of ways to enjoy this Pickled Peppers Recipe.
Make Ahead and Storage
Storing Leftovers
Your pickled peppers will keep beautifully sealed in the refrigerator for up to two weeks. Make sure to keep them submerged in the brine, and they will maintain their crispness and punchy flavor throughout that time.
Freezing
Freezing isn’t recommended for pickled peppers as it can alter their texture, making them mushy once thawed. The best way to enjoy them is fresh from the fridge while they remain crunchy and lively.
Reheating
There’s no need to reheat pickled peppers—they’re designed to be enjoyed cold or at room temperature straight from the jar. Their crispness and tang are at their best this way, so just grab and go when hunger strikes!
FAQs
Can I use different types of vinegar in this Pickled Peppers Recipe?
Absolutely! White vinegar is classic, but apple cider vinegar or even rice vinegar can be great alternatives. Just be sure to choose a vinegar with at least 5% acidity for safe and effective pickling.
How spicy will the pickled peppers be?
The spice level depends on the types of peppers you use. Jalapeños will add a medium heat, while banana and bell peppers offer much milder, sweeter flavors. Mix and match to suit your palate!
How long do I need to wait before eating pickled peppers?
For best flavor, wait at least 24 hours after refrigerating. This allows the peppers to soak up all the savory, tangy brine and develop their signature pickled taste.
Do I need to sterilize the jars?
Yes, sterilizing jars helps prevent contamination and keeps your pickled peppers fresh longer. You can sterilize jars by boiling them or running through a hot dishwasher cycle.
Can I add other spices or vegetables?
Definitely! Feel free to customize your Pickled Peppers Recipe with spices like red pepper flakes, dill seeds, or add slices of carrots or cauliflower for extra crunch and flavor variation.
Final Thoughts
There is something truly satisfying about making your own Pickled Peppers Recipe at home. Not only is it incredibly simple, but it also brings vibrant flavor, fun textures, and a homemade touch to your meals. Once you taste these spicy, tangy peppers, you’ll wonder how you ever lived without them. So, grab your favorite peppers and dive in—it’s time to pickle and enjoy!
Print
Pickled Peppers Recipe
- Prep Time: 10 minutes
- Cook Time: 5 minutes
- Total Time: 15 minutes (plus 24 hours refrigeration)
- Yield: 2 servings
- Category: Pickling
- Method: Stovetop
- Cuisine: American
Description
This Pickled Peppers recipe offers a quick and tangy way to preserve fresh peppers using a simple vinegar-based brine. Perfect for jalapeños, banana peppers, bell peppers, or a combination, these pickled peppers are vibrant, flavorful, and easy to prepare in just 15 minutes plus chilling time. Enjoy them as a zesty topping, snack, or condiment with your favorite dishes.
Ingredients
Peppers
- 1 lb fresh peppers (jalapeños, banana peppers, bell peppers, or a mix)
Pickling Brine
- 1 cup white vinegar (or apple cider vinegar)
- 1/2 cup water
- 1 tbsp sugar
- 1 tbsp salt
- 2 cloves garlic, smashed
- 1 tsp black peppercorns
- 1/2 tsp mustard seeds (optional)
- 1/2 tsp coriander seeds (optional)
- 1 bay leaf (optional)
Optional Additions
- 1 small onion, thinly sliced (optional)
Instructions
- Prepare the Peppers: Wash the peppers thoroughly under cold water. Depending on your preference, slice them into rings or leave them whole. If keeping whole, poke a few small holes in the peppers with a fork to allow the brine to penetrate more effectively.
- Prepare the Pickling Brine: In a medium saucepan, combine white vinegar, water, sugar, salt, smashed garlic cloves, black peppercorns, mustard seeds, coriander seeds, and bay leaf. Heat the mixture over medium heat until it begins to simmer, stirring occasionally until the sugar and salt fully dissolve. Once dissolved, remove the saucepan from heat and let the brine cool slightly for a few minutes.
- Pack the Jars: Place the prepared peppers and optional sliced onion into clean, sterilized glass jars. You can use either one large jar or multiple smaller jars depending on quantity.
- Pour the Brine: Carefully pour the warm pickling brine over the peppers in the jars, ensuring the peppers are fully submerged. Use a spoon to gently press the peppers down if necessary. Leave about half an inch of headspace at the top of each jar.
- Seal and Cool: Seal the jars tightly with airtight lids. Allow them to cool to room temperature before transferring them to the refrigerator.
- Refrigerate and Serve: Refrigerate the pickled peppers for at least 24 hours to allow the flavors to develop. The pickled peppers will keep fresh in the refrigerator for up to 2 weeks. Enjoy as a tangy addition to sandwiches, salads, or as a flavorful snack.
Notes
- You can customize the spices in the brine to your liking by adding chili flakes or herbs like thyme.
- Slicing peppers releases more flavor quickly, but whole peppers provide a crunchier texture.
- Use clean, sterilized jars to ensure the pickles remain safe and fresh.
- The pickled peppers taste best after at least 24 hours of refrigeration but can be enjoyed sooner if you prefer a lighter flavor.
- Store pickled peppers in the refrigerator and consume within 2 weeks for best quality.
