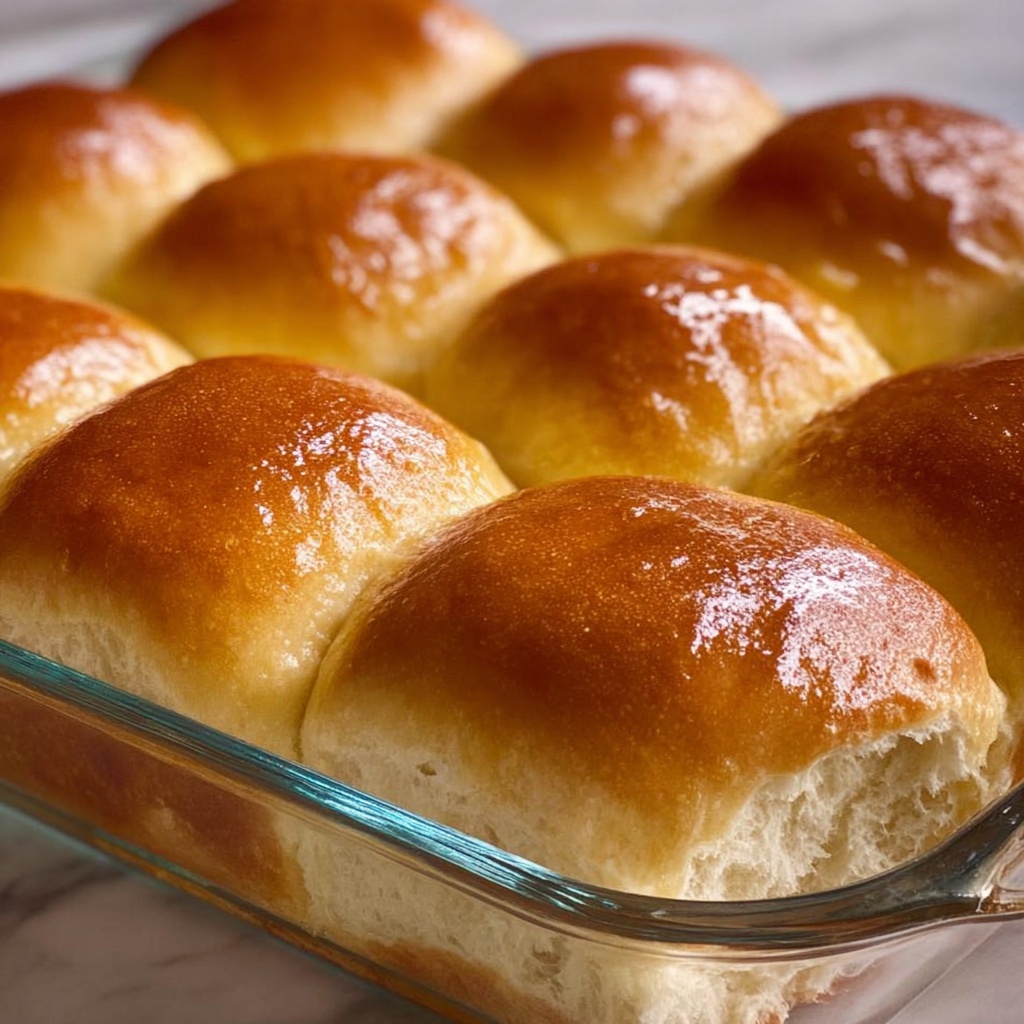
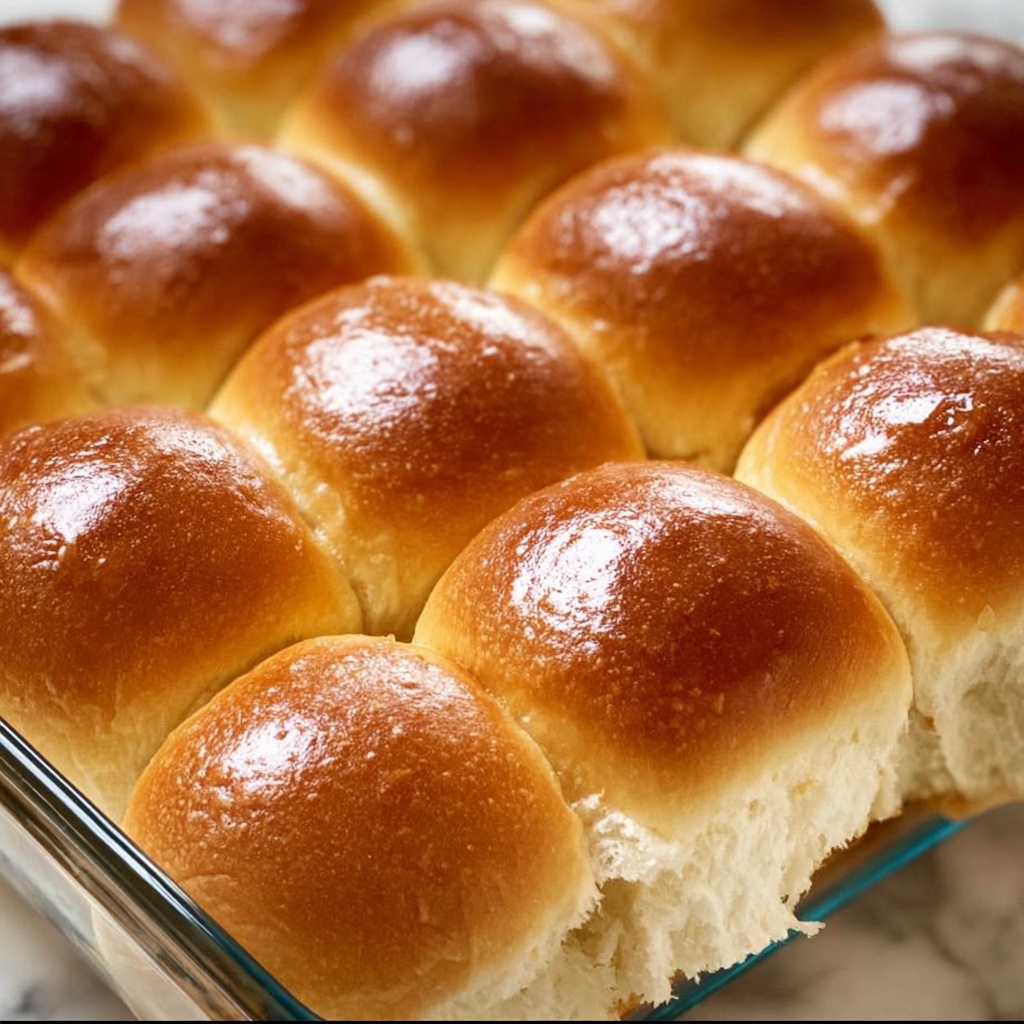
If you’re craving soft, fluffy, and irresistibly buttery bread to elevate any meal, this Homemade Dinner Rolls Recipe is exactly what you need. Perfectly golden on the outside and tender on the inside, these rolls are not just a side dish—they’re the star of the table. Whether it’s a family dinner, holiday feast, or casual get-together, these rolls bring warmth and comfort in every bite, making every meal feel like a special occasion.

Ingredients You’ll Need
The beauty of this Homemade Dinner Rolls Recipe is in its simplicity. The ingredients are all pantry staples, each playing an essential role in creating the perfect balance of flavor, texture, and appearance. From the richness of melted butter to the gentle tang of yeast fermentation, every element contributes to that homemade magic.
- All-purpose flour (3 1/2 to 4 cups): Provides the structure and soft crumb that make these rolls so tender.
- Active dry yeast (1 packet, 2 1/4 teaspoons): The key to that beautiful rise and airy texture.
- Warm milk (1 cup, about 110°F/45°C): Activates the yeast and keeps the dough moist and soft.
- Sugar (1/4 cup): Adds a touch of sweetness and helps feed the yeast for a perfect rise.
- Unsalted butter, melted (1/4 cup plus 2 tablespoons for brushing): Brings rich flavor and a golden, shiny crust.
- Large egg (1): Enhances the dough’s richness and contributes to the soft texture.
- Salt (1 teaspoon): Balances flavors and strengthens the dough’s structure.
How to Make Homemade Dinner Rolls Recipe
Step 1: Activate the Yeast
Start by combining the warm milk, sugar, and yeast in a small bowl. This little mixture is magic in action—letting it sit for 5 to 10 minutes until it becomes foamy confirms that your yeast is alive and ready to work. It’s the first step that sets these rolls apart with their light, fluffy texture.
Step 2: Mix the Dough
In a large bowl, bring together most of the flour, salt, the frothy yeast mixture, melted butter, and egg. Stir until a rough dough forms, then add more flour if necessary. You want a dough that’s soft but manageable—this ensures your rolls don’t turn out dense or tough.
Step 3: Knead the Dough
On a floured surface, knead the dough for 8 to 10 minutes until it’s smooth and elastic. This part is wonderfully therapeutic and crucial—it develops the gluten, which gives the rolls their perfect chewiness. If you have a stand mixer, this can save you some time and effort.
Step 4: Let the Dough Rise
Place your dough in a greased bowl, cover it, and give it an hour in a warm spot to double in size. This rise is where the dough transforms from a ball of ingredients into a fluffy cloud ready to be shaped into rolls.
Step 5: Shape the Rolls
After the first rise, gently punch down the dough to release air bubbles, divide it into 12 to 15 equal pieces, and roll each into a smooth ball. Nestle the rolls snugly in a greased baking dish or on a baking sheet, setting them up for their next big growth spurt.
Step 6: Second Rise
Cover the rolls again and let them puff up for 30 to 45 minutes. This second rise is essential; it ensures your Homemade Dinner Rolls Recipe gets that irresistibly soft and fluffy crumb inside.
Step 7: Bake the Rolls
Preheat your oven to 375°F (190°C). Before sliding the rolls in, brush their tops with melted butter to create a golden, glossy finish once baked. Bake for 15 to 18 minutes until they turn a gorgeous golden brown, filling your kitchen with the most delightful aroma.
Step 8: Serve
The finishing touch is a brush of melted butter while the rolls are still warm. This not only adds extra flavor but keeps the crust deliciously soft. Serve them right out of the oven for the best experience—warm, buttery, and utterly addictive.
How to Serve Homemade Dinner Rolls Recipe
Garnishes
Simple is often best with these rolls, but adding a sprinkle of flaky sea salt or a light brush of garlic herb butter elevates them into something truly special. Fresh parsley or chives add a pop of color and subtle flavor that makes each bite a little celebration.
Side Dishes
These rolls make the perfect companion to so many dishes. From hearty stews and creamy soups to festive roasts and smoky barbeque, their soft, buttery goodness balances and enhances every bite of your main course.
Creative Ways to Present
Try serving your rolls in a warm bread basket with a selection of flavored butters—think honey cinnamon or herbed cream cheese. You can also slice and use them to make mini sliders, or tear them apart and serve alongside a cheese platter for a fun, interactive meal.
Make Ahead and Storage
Storing Leftovers
If you have any leftovers, store the rolls in an airtight container at room temperature for up to two days. This keeps them soft and ready to be enjoyed without drying out.
Freezing
These rolls freeze beautifully. Just wrap them tightly in plastic wrap and then in foil or place them in a freezer-safe bag. Frozen rolls can last up to three months and are perfect for planning ahead or avoiding waste.
Reheating
When ready to enjoy your frozen or leftover rolls, simply warm them in a 350°F oven for 10 minutes wrapped in foil to restore freshness. A quick microwave session wrapped in a damp paper towel also works great if you’re in a hurry.
FAQs
Can I use bread flour instead of all-purpose flour?
Absolutely! Bread flour will give your rolls a slightly chewier texture due to its higher protein content, which some people love. Just keep an eye on the dough’s consistency and add flour or liquid as needed.
What temperature should the milk be for activating yeast?
Warm milk around 110°F (45°C) is ideal. Too hot, and it might kill the yeast; too cold, and the yeast might not activate well. Using a thermometer can help you get it just right.
Can I make these rolls dairy-free?
Definitely! Substitute the milk with a plant-based milk like almond or oat milk, and swap the butter for a dairy-free alternative. The rolls will still be delicious and soft.
Why did my rolls turn out dense?
Dense rolls usually mean the dough didn’t rise enough or was over-floured. Make sure your yeast is fresh, the dough has enough warmth to rise, and avoid adding too much flour during mixing.
Is it necessary to brush the rolls with butter before and after baking?
Brushing with melted butter before baking helps create that beautiful golden crust, and the post-bake brush keeps the tops soft and flavorful. It’s a simple step that makes a big difference.
Final Thoughts
If there’s one recipe to keep in your comfort food repertoire, it’s this Homemade Dinner Rolls Recipe. The process is straightforward, the ingredients are simple, and the result is sheer bread bliss. Share these rolls with loved ones and watch them disappear quicker than you can say “pass the butter.” I can’t wait for you to try them and make your table extra cozy and delicious!
Print
Homemade Dinner Rolls Recipe
- Prep Time: 15 minutes
- Cook Time: 18 minutes
- Total Time: 1 hour 45 minutes
- Yield: 12-15 rolls
- Category: Bread
- Method: Baking
- Cuisine: American
Description
These soft, fluffy dinner rolls are perfect for any meal, featuring a tender crumb and golden crust. Made with simple ingredients including warm milk, yeast, and butter, these rolls are easy to prepare with two rises, resulting in light, airy bread ideal to accompany dinners or to enjoy on their own.
Ingredients
Dough Ingredients
- 3 1/2 to 4 cups all-purpose flour
- 1 packet (2 1/4 teaspoons) active dry yeast
- 1 cup warm milk (about 110°F/45°C)
- 1/4 cup sugar
- 1/4 cup unsalted butter, melted
- 1 large egg
- 1 teaspoon salt
For Brushing
- 2 tablespoons melted butter (for brushing)
Instructions
- Activate the Yeast: In a small bowl, combine the warm milk, sugar, and active dry yeast. Let the mixture sit for 5-10 minutes until it becomes foamy, indicating the yeast is active and ready to use.
- Mix the Dough: In a large mixing bowl, add 3 1/2 cups of flour and salt. Pour in the yeast mixture, melted butter, and egg. Stir together until a dough forms, then add additional flour if the dough is too sticky to handle, until it’s manageable.
- Knead the Dough: Transfer the dough to a floured surface and knead by hand for 8-10 minutes until smooth and elastic. Alternatively, use a stand mixer fitted with a dough hook and knead for the same duration.
- Let the Dough Rise: Place the kneaded dough in a greased bowl, cover it with a clean kitchen towel or plastic wrap, and let it rise in a warm environment for about 1 hour or until it doubles in size.
- Shape the Rolls: After the dough has risen, punch it down to release the air. Divide the dough evenly into 12-15 portions. Shape each portion into a smooth ball and arrange them in a greased 9×13-inch baking dish or on a baking sheet, spacing slightly apart.
- Second Rise: Cover the shaped rolls and allow them to rise again in a warm place for about 30-45 minutes until they puff up and nearly double in size.
- Bake the Rolls: Preheat your oven to 375°F (190°C). Before baking, brush the tops of the rolls generously with melted butter. Bake the rolls for 15-18 minutes or until they are golden brown on top.
- Serve: Once baked, brush the rolls again with melted butter to give them a glossy finish and serve warm for best flavor and texture.
Notes
- Ensure the milk is warm, not hot, to properly activate the yeast without killing it.
- You can use a stand mixer with a dough hook to save effort during kneading.
- Covering the dough during rising helps keep moisture in and promotes better rising.
- Don’t skip the second rise for fluffier, lighter rolls.
- For an extra soft crust, brush the rolls with melted butter immediately after baking.
- These rolls can be frozen after baking; thaw and warm before serving.


