
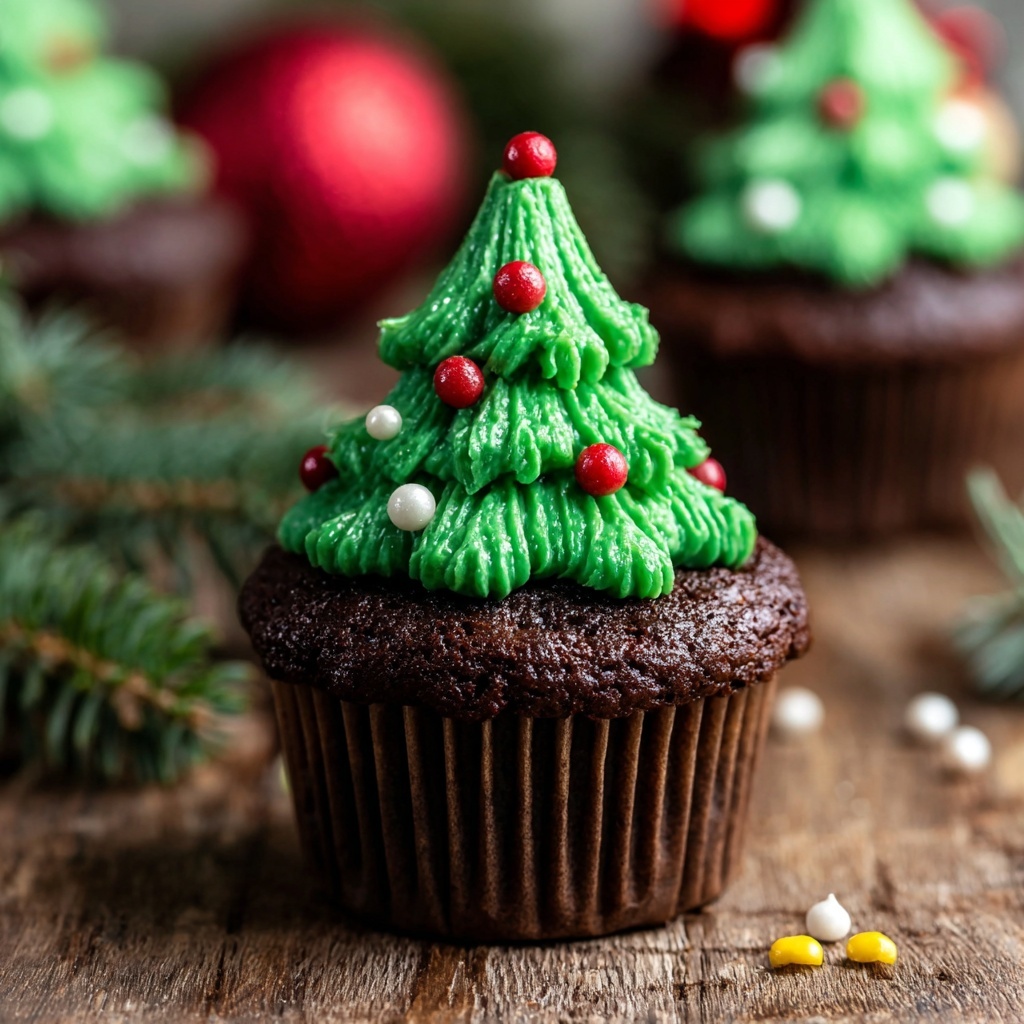
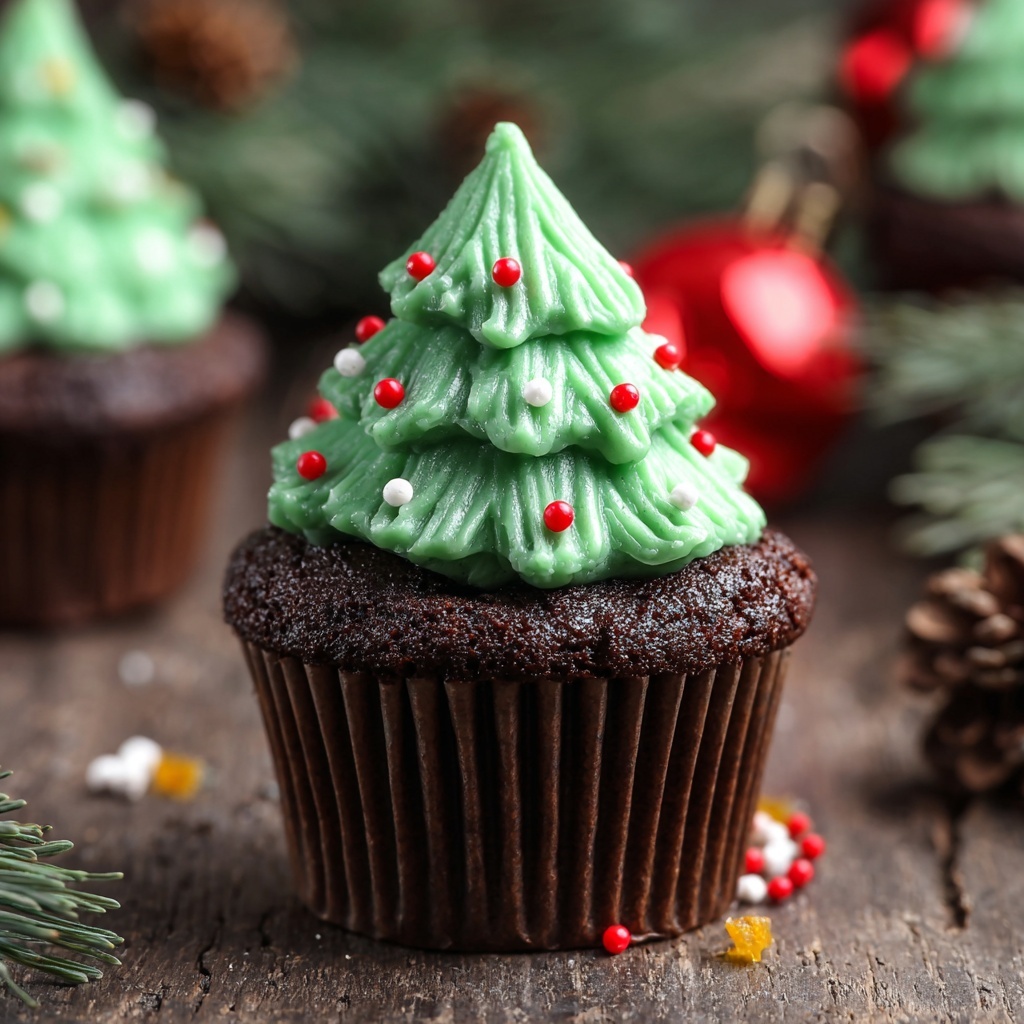
If you’re looking to bring a cheerful, festive touch to your holiday dessert table, this Christmas Tree Brownie Cups Recipe is an absolute showstopper. These delightful brownie bites have everything you need to impress—rich chocolatey goodness baked into adorable cups, crowned with creamy green frosting shaped like little Christmas trees, and finished off with colorful sprinkles and mini M&Ms that look like ornaments. Whether you’re serving them at a holiday party, gifting them to loved ones, or simply indulging your sweet tooth, these treats capture the joy and warmth of the season in every bite.
Ingredients You’ll Need
These ingredients are simple, easy to find, and each one plays a crucial role in bringing out the flavor, texture, and festive look of this dessert. From the fudgy brownie base to the vibrant green frosting and playful toppings, everything comes together effortlessly.
- Brownie mix (18.3 oz box): The base of our treat, providing rich, chocolatey goodness with minimal prep time.
- White chocolate chips (1 cup): Melted for dipping, these add a smooth, sweet contrast and help hold the festive sprinkles on the rims.
- Whipped topping (16 oz container): Light and fluffy, this makes the perfect canvas for coloring and piping the Christmas tree shapes.
- Green food coloring: Essential for turning the whipped topping into charming evergreen trees that catch the eye.
- Sprinkles (red and green nonpareils, sanding sugar): These bring sparkle, texture, and that unmistakable holiday vibe to each cup.
- Mini M&Ms (1 cup): Fun, colorful “ornaments” that make decorating your brownie trees joyful and customizable.
How to Make Christmas Tree Brownie Cups Recipe
Step 1: Prepare the Brownie Batter
Start by preparing the brownie batter according to the instructions on your box. It’s the quick and easy foundation for these festive treats, ensuring you get that rich and fudgy texture without any fuss.
Step 2: Preheat the Oven and Prepare Tins
Preheat your oven as directed on the brownie mix box. Meanwhile, grease two mini muffin tins thoroughly with cooking spray to make sure your brownie cups come out cleanly and keep their shape perfectly.
Step 3: Fill and Bake
Pour the prepared brownie batter into the mini muffin tins, filling each about two-thirds full. Bake them for 12 to 15 minutes, or until you see those edges turn firm and the tops develop a crinkly texture—a classic brownie sign. Check doneness with a toothpick inserted in the center; a few moist crumbs clinging to it means they’re perfectly baked.
Step 4: Create an Indentation
Right after baking, while the brownies are still warm, use a teaspoon to gently press into the center of each brownie, making a small cup. This indentation will soon hold your creamy frosting, turning each bite into a miniature holiday scene. Cool the brownies completely before removing them from the tins to keep them intact.
Step 5: Melt the White Chocolate
Place your white chocolate chips in a microwave-safe bowl and heat in 40-second bursts, stirring well after each. Continue heating in short 10-second intervals until the chocolate is fully melted and silky smooth. This step creates the perfect glue for sprinkles and adds a lovely sweet touch to the edges.
Step 6: Decorate the Rims
Dip the top edge of each cooled brownie cup into the melted white chocolate, then immediately dip it into a shallow bowl filled with sprinkles. This not only makes the dessert pop with color but introduces a fun, festive crunch with every bite.
Step 7: Prepare the Frosting
Add several drops of green food coloring to your whipped topping and gently fold until you reach that perfect evergreen shade reminiscent of fresh pine. This vibrant green frosting is the star of the ‘tree’ design.
Step 8: Pipe the Trees
Fit a piping bag with a large star tip, like a Wilton 1M, and fill it with your green whipped topping. Pipe swirling layers on top of each brownie to mimic the shape of a fluffy Christmas tree, building height and texture for a delightful look and mouthfeel.
Step 9: Add Decorations
Now the fun truly begins—decorate your whipped topping trees by placing mini M&Ms as “ornaments” and adding extra festive sprinkles if you like. It’s a wonderfully creative step that lets your holiday spirit shine through every cup.
How to Serve Christmas Tree Brownie Cups Recipe
Garnishes
To elevate these adorable treats, consider adding a light dusting of powdered sugar to resemble snow or a drizzle of melted white chocolate over the finished trees. Fresh mint leaves or edible glitter can also add a magical, wintery glow that guests will adore.
Side Dishes
Serve your Christmas Tree Brownie Cups Recipe alongside classic holiday beverages like hot cocoa or spiced cider for a cozy combination. They also pair wonderfully with a simple fruit platter or vanilla ice cream to balance out the rich chocolate flavors.
Creative Ways to Present
Display these festive bites on a tiered dessert stand adorned with pine sprigs and fairy lights to replicate a winter wonderland. For gift-giving, package them in decorative boxes or clear treat bags tied with red and green ribbons to spread holiday cheer beyond your table.
Make Ahead and Storage
Storing Leftovers
You can keep leftover Christmas Tree Brownie Cups in an airtight container at room temperature for up to two days. If your kitchen is warm, storing them in the fridge will help the frosting stay firm and fresh for up to four days.
Freezing
For longer storage, freeze the cooled brownie cups (without frosting) in a single layer on a baking sheet, then transfer them to a freezer-safe container or bag. When ready to enjoy, thaw them overnight in the refrigerator, then frost and decorate as desired.
Reheating
If you prefer your brownies slightly warm, gently reheat them for 10-15 seconds in the microwave—just don’t warm the frosting or decorations to keep the texture perfect. Enjoy the mix of warm chocolate with cool, creamy frosting for an irresistible treat.
FAQs
Can I make these brownie cups from scratch instead of using a box mix?
Absolutely! While the box mix saves time, a homemade brownie recipe with your favorite ingredients will work beautifully. Just ensure the batter is thick enough to hold its shape when baked in mini muffin tins.
What kind of whipped topping is best for piping the Christmas trees?
A stabilized whipped topping or whipped cream works best as it holds its shape longer, especially if you’re prepping ahead or serving in a warmer environment.
Can I use other types of chocolate instead of white chocolate for the rim decoration?
Yes! Dark or milk chocolate can be melted and used instead of white chocolate. Just keep in mind that white chocolate helps the colors of the sprinkles pop more vividly.
How do I prevent the frosting from melting before serving?
Keep your brownie cups refrigerated until just before serving. If you’re piping them well in advance, using stabilized frosting helps maintain the shape and prevents melting.
Are these brownie cups gluten-free?
They can be if you use a gluten-free brownie mix and ensure that your toppings and sprinkles do not contain gluten. Always double-check ingredient labels when accommodating dietary restrictions.
Final Thoughts
Nothing captures the spirit of the holidays quite like this Christmas Tree Brownie Cups Recipe. With fudgy brownies, creamy green frosting, and festive decorations, it’s a dessert that invites smiles and creates memories. Don’t hesitate to make a batch and bring joy to your celebrations—once you try them, these adorable treats will become a favorite holiday tradition.
Print
Christmas Tree Brownie Cups Recipe
- Prep Time: 10 minutes
- Cook Time: 15 minutes
- Total Time: 30 minutes
- Yield: 24 servings
- Category: Dessert
- Method: Baking
- Cuisine: American
- Diet: Vegetarian
Description
These Christmas Tree Brownie Cups are a festive and delightful holiday treat perfect for parties and gatherings. Mini brownie bites are baked in muffin tins, topped with green-colored whipped topping piped into Christmas tree shapes, and decorated with colorful sprinkles and mini M&Ms for a fun, edible decoration.
Ingredients
Brownie Base
- 1 (18.3 oz) box brownie mix, prepared according to the package instructions
Toppings and Decorations
- 1 cup white chocolate chips
- 16 oz container whipped topping
- Green food coloring (several drops)
- Sprinkles (red and green nonpareils, sanding sugar, etc.)
- 1 cup mini M&Ms
Instructions
- Prepare the Brownie Batter: Follow the instructions on your boxed brownie mix to prepare the batter until smooth and ready to bake.
- Preheat Oven and Prepare Pan: Preheat your oven according to the brownie mix directions. Grease two mini muffin tins well with cooking spray to prevent sticking.
- Fill and Bake: Pour the prepared batter into the mini muffin tins, filling each cup about two-thirds full. Bake for 12 to 15 minutes until the edges are firm and the tops have a crinkly texture. Test doneness by inserting a toothpick; it should come out with only a few moist crumbs.
- Create an Indentation: While the brownies are still warm, press a teaspoon gently into the center of each brownie to create a small indentation for the frosting. Let the brownies cool completely before removing them from the muffin tins.
- Melt the White Chocolate: Place the white chocolate chips in a microwave-safe bowl. Microwave initially for 40 seconds, then stir. Continue microwaving in 10-second increments, stirring thoroughly between each until fully melted and smooth.
- Decorate the Rims: Dip the top rim of each cooled brownie into the melted white chocolate, then immediately dip into a shallow bowl of sprinkles to create a festive decorative edge.
- Prepare the Frosting: Add several drops of green food coloring to the whipped topping container and fold gently until the color is evenly distributed and reaches your desired shade of green.
- Pipe the Trees: Fit a piping bag with a large decorating tip (such as a Wilton 1M). Pipe the green whipped topping onto each brownie in a Christmas tree shape, layering to create fullness and a festive look.
- Add Decorations: Finally, decorate your whipped topping Christmas trees with mini M&Ms as ornaments and additional sprinkles to enhance their festive appearance.
Notes
- Ensure brownies are completely cooled before decorating to prevent melting whipped topping.
- You can substitute the whipped topping with homemade frosting if preferred.
- Use a variety of sprinkles and edible glitter to customize decorations for your holiday theme.
- If you don’t have a piping bag, use a plastic sandwich bag with the tip cut off as a substitute.
- To melt white chocolate evenly, stirring frequently is essential to avoid burning.


